A few nice rapid prototyping China service images I found:
Smart Doll
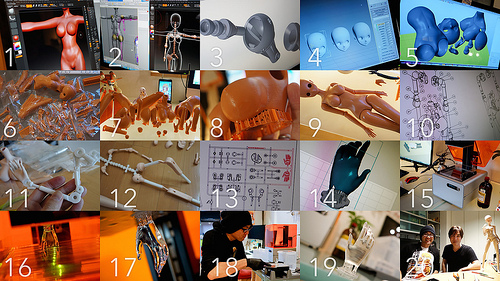
Image by Danny Choo
Design & Mold Preparation
1. The software we use to sculpt the body is a 3D software package called ZBrush.
2. ZBrush data is then imported into 3D Max for various tweaks and to make sure everything moves and fits together.
3. We used two different types of CAD packages for the frame – SolidWorks and Pro/ENGINEER.
4. The face is initially mirrored but then manually tweaked so that its not unnaturally symmetrical.
5. We use a software called Netfabb to prepare the data for printing.
6. Back then, I used a 3D printing service in Tokyo called Digimode – all I needed to do was to submit my STL data and a few days later they would send back the parts.
7. Digimode used the Envisiontec Ultra rapid prototyping China machine to print the parts.
8. The bits that you see attached to the bottom of the bust are called Support Structures which need to be snapped off and sanded down.
9. This is the first time I see my creation as a whole ^o^ The next step is discussed in the following section "Soft Vinyl Mold Preparation."
10. Now that the body shell data is complete, we need to tweak the internal frame data based on findings from our 3D printouts.
11. We used a 3D printer that printed in nylon as it was the optimum material needed to see how joints rubbed against and fitted with each other.
12. We tweak the data based on the 3D printouts and repeat the process a zillion times until we feel the design is optimum.
13. The frame is going to be injection molded so we need to prepare the mold data. This process was way more complex than I imagined and involved knowledge of material flow, cooling levels, wrinkling, warpage, mold temperature, injection pressure etc etc – all that and more just to know where to put the pieces in the mold and where to attach the runner gates.
14. After a while, we managed to get our own 3D printer which we started to use for production (review here). Just like before, we prepare some STL data of the part to be printed and load it into the printer software called PreForm.
15. Preparation of the printer by pouring in the clear resin.
16. An ultraviolet laser beams up from inside the printer and hits the bottom of the tank to cure the resin.
17. This hand can take between 2 and 6 hours depending on the layer thickness setting.
18. The printed parts are then removed from the Build Platform.
19. To use this printout for our doll production, I cut off the Support Structures and then sand down the surface to prepare it for the next step which is Casting. My goal is to create a copper mold used for mass production of the soft vinyl shell.
20. Photo together with Miyata Noriaki who I designed the frame with.
View more at www.dannychoo.com/en/post/27195/Smart+Doll.html
Arik Levy – black_honey
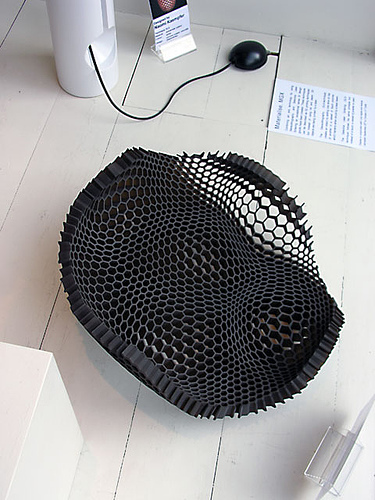
Image by rootoftwo
Materialise are specialists in the field of Rapid Prototyping China. They offer services to the industrial, medical and dental sectors but with their .MGX brand they have been making major waves in the design world with computer-manufactured designs for lighting and decorative objects.
www.ldesign.fr/
Assa Ashuach – Omi
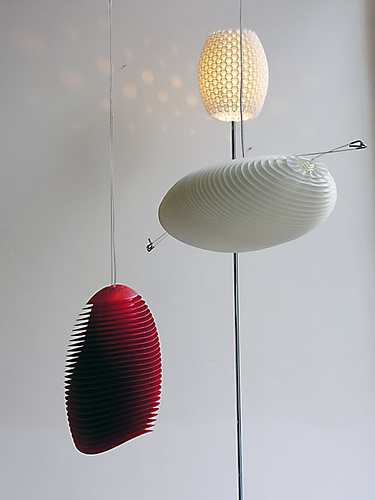
Image by rootoftwo
Materialise are specialists in the field of Rapid Prototyping China. They offer services to the industrial, medical and dental sectors but with their .MGX brand they have been making major waves in the design world with computer-manufactured designs for lighting and decorative objects. The unlit white piece is Omi by Assa Ashuach.
www.assaashuach.com/